Showing posts with label Memento Ink. Show all posts

Thursday, February 14, 2013

Happy Valentine's Day!

Hello there, and Happy Valentine's Day to all!

I hope that you all find a few minutes to spend with that 
'someone special' today!

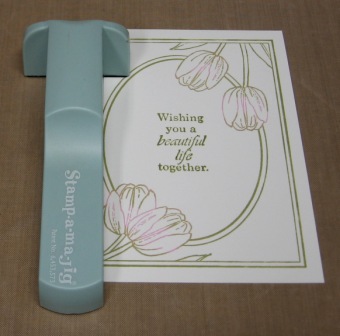
Great Impressions Stamps:  D363 Hanging Candy Hearts, D364 Happy Valentine's and Flowers
This sweet stamp makes me smile.  It is my day to post for the Great Impressions Stamps Blog, and I could not resist inking this one up. Can you imagine a Valentine's Day without Candy Hearts?


Exciting Announcement!
You are invited to join the 2012 Paper Crafts Magazine Gallery Idol Girls, as they celebrate Valentine's Day, with a Blog Hop!  There are many prizes to be won - Great Impressions Stamps is one of over 20 generous sponsors!  You can find the line-up for the hop, and more information
 Thanks so much for stopping by - Have fun, and Happy Hopping!

Hugs,
Patti J.
~ ~ ~ ~ ~ ~ ~ ~ ~ ~ ~ ~ ~ ~ ~ ~ ~ ~ ~ ~ ~ ~ ~ ~ ~ ~
Supplies Used:
Great Impressions Stamps: D364 Valentine's and Flowers
Great Impressions Stamps: D363 Hanging Candy Hearts
Memento Tuxedo Black Dye Ink (Tsukineko)
Ribbon (from my stash)
Silver half-pearls (Michael's)
Glossy Accents (Ranger)
Zig Writer Pen
DCWV Paper Pad: Everyday
Copic Markers: R02, RV10, YG11, Y11, R27, RV34

Sunday, February 10, 2013

Blog Candy!

Happy Sunday! 
Goodness, I hope that you are not snowed in - that snowstorm is incredible, 
and I must admit that I'm very glad it's not here.

I have not had any blog candy posts in a very long time, so let's do it!
I've been lucky enough to have been a Guest Designer at Great Impressions Stamps for Jan. and Feb.,
and here, I'm sharing a card that is created with G.I. stamps.  I love this sweet basket,
and it called right out to my pastel copics!  The best thing about it, is how it needs nothing else - just stamp, mat, and assemble card!

Great Impressions Stamps:  Easter Basket F518, Cursive Happy Easter C430


SO....on to the candy!

What IS the candy, you ask?
Your choice of THREE stamps from the Great Impressions Stamps Store!

What do you have to do to win?
Just leave a comment here, on this blog post, then head over to Facebook to the Great Impressions Stamps Facebook Page.  "Like" them, and leave a comment saying "Patti J. sent me".
That's it!
Easy Peasy!
You could soon be inking up some brand new, yummyliscious stamps!

On a side note, I have some new followers - welcome!
I've tried to visit some of you, too, but blogger won't let me click through from your photo to find your blog links.  I think there is a permission box someplace that has to be checked for your profile info to be visible to me.  Anyway, if I have not been to visit, please know that I have tried!!!

Have a great week!

I'll draw for this prize on Wednesday morning, Feb. 13th, and
will post the winner on my blog.

Good luck!!!

Patti J.


I'm entering this card in these challenges:
 Oozak: Anything Goes with Favorite Colors (LOVE Pastels!)
Through the Craft Room Door (Anything Goes)
Challenges 4 Everybody: Anything Goes


Supplies Used:
Great Impressions Stamps: Easter Basket F518, Cursive Happy Easter C430
Perfect Layers Tools for straight matting edge (see sidebar for details)
Express-It Blending CS
Purple CS from my stash
Memento Tuxedo Black Dye Ink
Ribbon (Hobby Lobby)
Twine (Really Reasonable Ribbon)
Dimensional Foam (Michael's)
Copic Markers (Oozak.com)
V01, BV0000, YG41, G24,
Y28, E37, E35, E33, E31, E000, E95,
G000, Y15, Y11, RV23, RV000, B02, B000

Tuesday, January 22, 2013

Delicious Wishes

Hi there, and Happy Tuesday!

Hope that your holiday weekend was as wonderful as ours!  I'll share in a moment... 

I saw that the challenge at the Impression-Obsession blog this week was 'Sweet Thoughts', and here is the card that I made for the challenge:

Impression Obsession Stamps: B3728, Delicious Wishes, Memento Rich Cocoa Dye Ink, Recollections Pearl Flourishes, Spellbinders Dies, My Mind's Eye 'Love Me' Gingham Background DP, American Crafts DP, Dimensional Foam, Ribbon: Amuse Studio, Adhesive

 Two mason jars were cut out of the DP, one for the jar itself, and one for just a lid, which was cut out and popped up on dimensional foam, with some pleated ribbon under the edge.

So, onto the weekend!

We were blessed to be able to fly out to Phoenix for our daughter and son-in-law's party, and had such a great time.  We met friends and Nick's friends and family, and of course, seeing Nick (our SIL) after a 9 month deployment was a joy in itself!
Our son, and his beautiful lady were also able to fly in from California, and it was such a blessing to meet her. This was the first time in well over a year that the four of us were together at the same time.

Here are a few photos of the food tables - never did get one that day of the beautiful couple!
Nick's mom, Jan, and his sister, Jessica, worked so hard in preparation for this event, and it was amazing. The food was delicious, and beautiful, as well.  Jan and Jess, if you are reading, thank you SO much!


On Sunday, Melissa, our amazing daughter, ran her first-ever full marathon.  She has run many half-marathons and other races over the last 9 months, literally, 'running her way through deployment', and decided to run this full marathon with Nick home to cheer her on, as a way of finishing that chapter of their lives and getting ready to begin a new chapter.

Anyway, this is why I've been AWOL again for a several days!  We had no computer with us, so I couldn't even read email!!!

Thanks for stopping by today!

See you soon :)
Patti J.

Friday, December 14, 2012

12 Days of Christmas Blog Hop


WELCOME TO THE DECEMBER “12 DAYS OF CHRISTMAS” BLOG HOP!

Hi everyone!  
Happy Holidays from everyone at the Blog Hop for Sean & Regina!   
Thank you for playing along in our December blog hop!  
The Blog Hop with Sean & Regina features only Gina K. Designs stamps for our monthly blog hops!  

This month, we are featuring the “12 Days of Christmas”.  Each blog hop designer will be hosting a day from December 13 – December 24 that will feature Christmas/Holiday cards using a Gina K. Designs stamp set.  A list of designers are listed below with the day they will be hosting.  You are invited to take part in each of the twelve days. Subscribe and comment on the designer’s blog hop for the day and at the end, one person who has completed the entire twelve days will win a wonderful GINA K. DESIGNS PRIZE PACK!
Enjoy yourself as you hop along for the holidays!  


OUR BLOG HOP PRIZE!

A Gina K. Designs Prize Pack including:
Gina K. Designs stamp set
Gina K. Designs Pure Luxury card stock
Gina K. Designs pattern paper
Brads
Ribbon
Embellishments 

Gina K. Designs "Very Merry Christmas", GKD Pure Luxury Heavyweight CS, Cuttlebug Folder, Copic Markers, Memento Tuxedo Black Dye Ink, Glitter, E.K. Success Dimensional Squares


Gina K. Designs 'Festive Frame' Stamp Set, GKD Pure Luxury White Heavyweight CS, Memento Tuxedo Black Ink, Ranger Fine Detail Embossing Powder (Silver), Nail Head Embellishments (Wal-Mart), Perfect Layers Rulers


Gina K. Designs 'The Magic of Christmas' Stamp Set, GKD Pure Luxury White Heavyweight CS, Tim Holtz Adirondack Lettuce Ink, Broken China Distress Ink, Stormy Sky Distress Ink, Diamond Dots (?) from Archiver's, Memento Tuxedo Black Dye Ink


Gina K. Designs Vintage Borders Stamp Set, GKD Pure Luxury White Heavyweight CS, Copic Markers, Memento Tuxedo Black Dye Ink, Scor-Pal, Scor-Bug, Ribbon Scrap


LET'S GET HOPPING.....
Now it is time to blog hop with all of our friends!   
The rules are simple:
  1. Visit each participating blog on the list below from December 13 – December 24. 
  2. Leave a comment for the blog host designer.
  3. Become a follower of each participating blog.
If you follow rules 1 – 3, you will be eligible to win the grand prize of a Gina K. Designs Prize Pack.
At the end of the hop, a random winner will be chosen for the Blog Hop Grand Prize using comments and followers from each blog. We will be posting the winner a day or so after the holidays!   
The blog hop designers this month and the designated date they are hosting are as follows:


Tomorrow, Cheryl Wright will be posting the next in the “12 Days of Christmas” blog hop!  Please visit her blog. 

Thank you for visiting my blog! 
Merry Christmas & Happy Holidays!

Monday, November 26, 2012

Why do snowmen wear hats?

Good morning!
It's Monday, and time for a new Stamp of the Week at Repeat Impressions Stamps.
I'm sure you are all wondering why DO snowmen wear hats?
Well, to cover up their bad twig days, of course!

Today, we are featuring the 'Twig Hair Snowman'.  This image is so sweet, that I wanted to keep my card very simple. 
Repeat Impressions 'Twig Hair Snowman" #2003, Repeat Impressions 'Thinking of You' #1105, Memento Tuxedo Black Ink, Martha Stewart Glue Pen, Glitter, Copic Markers, Ribbon Scrap, Perfect Layers Rulers (see sidebar for details)
I stamped the image and sentiment, and drew some black lines to frame this cutie patootie.  All that was left to do was color him, and add some snow.  Hope he gave you a giggle or two!

I'm sure that my fellow Rockstars have had some fun with this image too!

Cheri     Karen     Geri

Check out their creations, and then head over to the RI Blog, The House That Stamps Built, for information on getting this darling snowman for 50% off this week!

Have a great week,
Patti J.

Wednesday, November 7, 2012

Thankful...

Hello!
Welcome to a new Designer's Choice Challenge at Repeat Impressions.
Today, our hostess is the uber-talented Geri!
Geri's challenge is: 'Anything That Gives Thanks'.

Repeat Impressions #3212 To Everything..., Repeat Impressions #5127 Maple Leaf Silhouette, Kaleidacolor Ink Pad "Autumn", Memento Rich Cocoa Dye Ink

I think I should have made my center panels just a bit narrower, as it's 'just' off enough that it looks like I didn't get it centered! Lol, it's supposed to be off-center and to the left.  I used my Perfect Layers Tools for perfect borders around the DP.

This was so easy to create!  Hope you'll join us for Geri's 'Anything That Gives Thanks' challenge at the RI blog, The House That Stamps Built!  You could be the happy winner of some fabulous RI stamps!

My fellow Rockstars have some 'thankful' projects to share!
Check out the RI blog, The House That Stamps Built to see who has participated this week, and 
for all the challenge details!  Hope to see your card linked up!

Hugs and blessings,
Patti J.

Monday, November 5, 2012

For the Beauty...

Good morning!
Welcome to Monday's Stamp of the Week at Repeat Impressions!
Today, we are featuring a lovely sentiment, 'For the Beauty', that could be used for any season.
The sentiment needed to be the focal point of this card, so a CAS creation seemed to be calling...

Repeat Impressions #3213, 'For the Beauty', Simple Stories Sticker Sheet 'Harvest Lane', and Bazzill CS. Sentiment stamped with Memento Rich Cocoa Dye Ink, Perfect Layers Rulers

This card was so easy to create.  The sentiment was stamped on a scrap of Bazzill CS, mounted on a dark brown mat, and adhered to the card front.  Using a sheet of Simple Stories 'Harvest Lane' stickers, the rest of the card came together in about one minute!  Of course, I used my Perfect Layers Tools for my nice even mat!  Be sure to use the code on my sidebar for 5% off if you decide to order a set for yourself!

All righty, time to hop over and see what my fellow Rockstars have created!
I have to admit that I peeked at these projects in the gallery, and WOW!  What beauties!

Cheri     Kecia     Geri     Joyce

Don't forget - the stamp of the week is available this week for 50% off to all Repeat Impressions followers!
Head over to the Repeat Impressions Blog, The House That Stamps Built, for all of the details!

Have a great week,
Patti J.

Monday, October 29, 2012

Black Cat

Hope you have all had a wonderful weekend!


I'm here today to share the Repeat Impressions Stamp of the Week, 'Black Cat'.

You know how I love to mask, and to create scary skies, so this one was fun to make!

Repeat Impressions #2322-G Black Cat, Repeat Impressions #2308-E Bats, Repeat Impressions #1139-W Halloween, Memory Box "Blackbird" DP, Memory Box Die "Madison Window Small", Kraft Cardstock, Tim Holtz Distress Inks: Broken China, Tumbled Glass, Stormy Sky, Dusty Concord, Memento Tuxedo Black Dye Ink, Adhesive, Dimensional Squares.
 
The Black Cat image was stamped on white cardstock, and fussy cut.  I die cut a window, using the Memory Box Madison Window Small. Once I had it cut, I sponged it to look aged and eerie.  I trimmed a scrap of cardstock to fit behind the window, masked off a moon, and began sponging until I got the right shade of eeriness.  Stamped the bats, and put the panel and window together.  Adhered it to a scrap of DP, and popped the black cat up in front with dimensional squares.  Voila - pretty quick!

Now, I know my fellow Rockstars have some very fabulous Black Cat projects to share!
Check them out - you will love them!

Cheri     Geri     Karen

Thanks for stopping by today!

Blessings,
Patti J.

Wednesday, October 10, 2012

Repeat Impressions Designer Choice Challenge - Masking

It's Wednesday, and that means a new challenge is up at the Repeat Impressions blog, The House That Stamps Built.  Christy is our hostess this week, and she has challenged us to use the masking technique on our projects.  Here is my card:

Repeat Impressions Bats #2308W, Black Cat #2322W, Tombstone #2317W, Halloween #1139W, Tim Holtz Distress Inks: Dusty Concord, Tumbled Glass, Broken China, Stormy Sky, Wild Honey, Copic Markers, C0, C1, YG95, Memento Tuxedo Black and Dandelion Dye Inks, amuse Pigment Ink, Blackberry, Perfect Layers Tools
There were several 'masks' on this card.

1. On focal panel, mask the top and bottom, using painter's tape, eclipse tape, post it notes, etc.
2. Punch 1" circle from your choice of masking material - place in sky where moon would go. Save the outer part for later.
3. Stamp black cat, as shown.
(When masking a scene, always stamp the image(s) that will be in the foreground, first).
4. Stamp black cat again on masking material, cut out, and place over cat on focal panel.
5. Stamp tombstone twice on focal panel, overlapping the cat on each side. 
6. Stamp tombstones again on masking material, cut out, and place on focal panel tombstones.
7. Sponge as desired.  
8. Remove all masks.
9. Using the outer part that you saved from the circle, place it over the 'moon', and sponge very lightly with the Dandelion Ink until your desired color is achieved.
10. Stamp bats over moon and on left side.
11. Sponge around the edge of focal panel with amuse ink. Mount to purple piece, then to white card front.

Hope this makes sense!

My Perfect Layers Tools were used to create my nice, even mat!

Hurry on over to see what my fellow Rockstars have created using the masking technique!

Christy     Cheri     Joy     Karen     Kecia     Geri     Joyce

After you check out their cards, be sure to create something using the masking technique, and link up over at The House That Stamps Built Blog!  You could be this week's big winner!

Have a great week - thanks for stopping by!

Blessings,
Patti J.

Wednesday, September 26, 2012

Designer's Choice Challenge...My turn!

Welcome to a new Designer's Choice Challenge at Repeat Impressions!  I'm the lucky hostess this week, and my choice was to incorporate some paper piecing on our projects.

Here is my card:

I totally love using fall colors, so the leave was stamped three times on the outside cover with Memento Rich Cocoa Ink.  I stamped the leaf once more on patterned paper from last year's DCWV Autumn paper pack, cut it out, and adhered it over the center leaf. 


The leaves on the card itself, and the envelope, were stamped using the Autumn Kaleidacolor ink pad.

I can't wait to see YOUR paper piecing!  As soon as you've created your beautiful project, head over to the Repeat Impressions blog, The House That Stamps Built, and link it up there!  You might be the lucky winner of some new Repeat Impressions stamps!

Now, be sure to check out the lovely creations that my fellow Rockstars have to share with you!

Christy     Cheri     Joy     Karen     Kecia     Geri     Joyce


Have a great week!
Patti J.

Monday, September 3, 2012

Cute as a Button...

Good morning!

Hopefully, you are all enjoying a Monday of rest :)  Well, it's definitely Monday, and that means a new Stamp of the Week at Repeat Impressions!  Today's SOTW is "Cute as a Button".
Repeat Impressions 'Cute as a Button (4126-W), Tag (lg) (5216-W), New Arrival (4116-W), Pink Tombow Marker, Amuse Dots Cardstock, Ribbon from my stash, Dimensional Foam, Baker's Twine (Really Reasonable Ribbon), Memento Tuxedo Black Dye Ink, Colorbox Pink Pastel Chalk Ink


I wanted to keep this as simple as possible, so that the stamp would be in the spotlight.  If you have any questions, let me know. I've listed the supplies under the photo - feel free to let me know if you need additional info.

My fellow Rockstars have some delightful projects to share today, as well!  Hop over to see their beautiful creations!

Cheri     Geri     Karen

Remember, there is still time for joining in challenges at the Repeat Impressions blog, The House That Stamps Built - check out the blog for details!

Have a great week,
Patti J.

P.S. Thanks so much to those of you who have so graciously sent cards and/or packages to our DD and to our SIL in Afghanistan.  If anyone would like to send anything else, the shipping/mailing deadline is October 1st.  With good luck, these men and women will be back in the USA by mid December.  I have a list of needed items, so feel free to contact me.  Thanks again to some very amazing and wonderful ladies out there, for being so thoughtful the past 7 months!

Monday, August 27, 2012

Ghosties...

Hi there!

I don't know about you, but I think these little Neat and Tangled Halloween ghosties are as sweet as can be.  I just couldn't wait to ink them up again :)
Neat and Tangled, Tim Holtz Distress Marker, Kraft CS, Memento Tuxedo Black Ink, Ribbon from my stash


Who can resist Kraft, black, and white?  The clouds were 'colored' with my Tim Holtz white distress marker, which I am loving!  Stamped the fence at the top and bottom for some fun borders :)

Thanks so much for stopping by today...

Hugs,
Patti J.

Wednesday, August 8, 2012

Let Your Dreams Take Flight...

Good morning!

Welcome to the Repeat Impressions What If Wednesday Sketch Challenge #A812!   Wendy has once again provided us with a fun sketch to work with.  I couldn't resist using the hot air balloons with this one!

Here is Wendy's sketch:


And here is my card!
Repeat Impressions #9116-N Air Balloon Cluster,  #9117-F Dreams Take Flight, Amuse Cardstock, Gina K. Designs Pure Luxury White Cardstock, pearls, green satin ribbon, and white trim from my stash, Memento Tuxedo Black Dye Ink, Perfect Layers Tools, Cuttlebug Swiss Dots Embossing Folder

I chose to use one of the sentiments and images from the 9100 series that was released recently. The balloons were paperpieced with the cute dotty cardstock from Amuse. Perfect Layers Tools were used for my nice straight mats.

We would love to see your take on this sketch!  Link up your card at The House that Stamps Built - you could be the next lucky winner!  Repeat Impressions stamps don't have to be used, but if you have them, we'd love to see them!

Check out my fellow Rockstars!  I'm sure they have some fabulous creations to share!

Cheri     Dawn     Joy     Karen     Kecia     Lynette     Makiko

Thanks for stopping by,
Patti J.

Tuesday, July 24, 2012

Christmas in July...

Hi there...I have a creation that I'd like to share with you today.  
Today's project is for the Flourishes' Timeless Tuesday Challenge, which is, Christmas in July!
Christmas Card

Gift set of card and box of notes

Box of notes with transparent lid to the side.

Last week, Beate Johns, had a tutorial and video at Splitcoaststampers, showing how to make this delightful box full of beautiful note cards.  You can find Beate's tutorial and video here.  (To see another version of this great little box, check out my talented friend, Lorie's blog!)  I chose to make a gift set, of a Christmas Card, and this Note Holder Box.  I hope you like it!  I'm keeping this post as short as possible today, but let me know if you have any questions!  I will post supplies used at the bottom.


NOW....
Welcome to Flourishes’ Christmas in July sale! 

Each year around this time, Flourishes kicks off a festive sale that is sure to warm your hearts and get you in the spirit, long before the snow starts to fly! 

Between now and the 31st of July, all of their Christmas sets will be a whopping 25% off! 

Just click HERE to see all the fun sets that are on sale! 

They just got a NEW shipment of stamps to stock up so the Flourishes warehouse is stacked to the brim with Christmas goodies! 

There are no codes -- all stamp sets are automatically marked down for you!

Don't forget to stop by the amazing Timeless Tuesday's Design Team Blogs. I'm sure they have some Christmas inspiration there for you!
Hope to see your Christmas creation in the Timeless Tuesday Challenge this week!

Hugs and blessings,
Patti J.

Supplies used:
(all 'linked' products are from Flourishes)
Colored Pencil (faux stitching on tag)
Transparency sheet (box lid)
Cardstock Scrap
Circle Punch

Wednesday, May 30, 2012

Let's Get Sketchy!

Hi friends!  As it's Wednesday, it is time for a new Repeat Impressions Sketch Challenge.  The sketch, shown below, is fun and easy to create with.   I chose to use "My Sunshine" (8402W) on my card. 
 
Supplies: Repeat Impressions 'My Sunshine' (8402 W), Echo Park Summer Days DP, Stampin Up: Corner Punch, Ribbon Scrap, Kaiser Craft Pearls, Memento Tuxedo Black Dye Ink, Perfect Layers Tools, Copic Markers


I have been waiting for just the right opportunity to use this stamp.  When I was growing up, my mom used to spend long periods of time brushing knots out of my 'oh-so-thick' hair, and would sing this song to me to keep my mind off of the tangles.  The Echo Park papers were a perfect companion for this happy stamp! Thanks, Wendy, for the memories.


Sketch to follow this week!!!

I hope to see all of you participate in the challenge at the Repeat Impressions blog, The House that Stamps Built.  We'd love to see your take on the sketch!  Repeat's stamps do not have to be used, so don't let that stop you!  If you have them, we'd love to see them, but they are not required.  Full challenge deets are on the blog - check it out, and get that card linked up - you could win some Repeat Impressions goodness!!!

Please be sure to visit my DT family to see what beautiful things they have to share with you today!

Cheri     Dawn     Joy     Karen      Lynette     Makiko    

Kecia, our fellow member, could not participate this week due to family emergency.  She could certainly use some thoughts and prayers, today especially, if you'd like to pop by her blog and offer some. Her DH suffered a very serious heart attack, and must undergo surgery.  Thanks in advance for your kind words or unspoken thoughts.

Have a great day - mine is full again with a road trip, and a bit of grocery shopping, but I'll be dropping in on you tonight to see what's shakin' on your blogs!

Hugs and smiles,

Patti J.

Wednesday, May 23, 2012

Soaring By to Say Hi

Good Morning!

It's Wednesday, and time for a new Repeat Impressions Designer's Choice Challenge.  Today's hostess is Karen, and she has challenged us to use three elements in our projects: A stamped image, embossing, and a die cut or punch.

Supplies: Repeat Impressions 9116-N Air Balloon Cluster, 9104-G Soaring By To Say Hi, Spellbinders Circle Dies, Martha Stewart Border Punch, Quick Kutz Embossing Folder, Amuse Cardstock, Bazzill Basics CS, Offray Ribbon, Stampin' Up! Bashful Blue Ink, Memento Tuxedo Black Ink, Tsukineko Sponge Dauber, Recollections Dimensional Squares, Copic Markers.


I'm featuring stamps from the latest Repeat Impressions Release.  I've wanted to ink up this Air Balloon Cluster for weeks!  What a great image, and one that would work for such a variety of occasions!

Hope to see you at Repeat Impressions' Blog, The House that Stamps Built!  We would love to see you enter the challenge.  All the details are on the blog - if you don't own any RI stamps, it's okay - you can enter whatever you have!  If you do use RI stamps, you'll get an extra entry in the challenge drawing! 

Thanks for stopping by!

Hugs and blessings,
Patti J.

Friday, March 16, 2012

Beautiful Life Together

Hello Friday!  Even though I'm retired, there is still something about weekends that makes me go "aaahhhhhhh".

We have friends who's first of three sons has just gotten married.  Today, I'm sharing a card for the newlyweds.


Before I get started, I want to thank those of you who have sent mail to our DD or her DH.  If you would like to see just how much one kind word from a stranger makes a difference, please read this blog entry of DD's. If you don't have time or money to send cards, even a simple caring comment on her blog might make the difference in her day.  Thanks everyone!

Now!  Some of you have emailed me asking for a tutorial on how I did this card:


I wish I could take full credit for this beautiful card/technique, but if you recall, this was one of the projects Shirley had for us to do the last time I went to her 'playroom' for a girl's day in'.

Since this technique is perfect for the wedding card I needed to make, it seemed the perfect time to post a tutorial.  Warning - LOTS of photos!

Here's what you need: Stamps (Gina K. Designs 'Beautiful Life'), Inks (Colorbox Fluid Chalks), White CS (GKD Pure Luxury White), Stamp-a-ma-Jig, and sponge daubers.

Working with your lightest color first, daub ink on the flowers.  The chalk ink that I used, will remain moist for some time, no need to huff before stamping.

Using darkest color, finish daubing on color.

Stamp image onto cardstock, being sure to place even pressure for full covrage of image.

Now, you will need some inks for your butterflies. Again, daub on your lightest color first, then your darkest color.
Voila!  Ready to fussy cut!

For the sentiment placement, I use a Stamp-a-ma-Jig.  If you don't have one of these, it is probably the best ten bucks I've ever spent.  Seriously!

First, you will place your stamp on an acrylic block.  Taking the plastic square, you will butt it up against the corner of the Stamp-a-ma-Jig.  (Some people do this at the bottom of the tool - I prefer working at the top of the tool. Your choice!) Now, take your stamp, ink it up, and place it in the corner, flush against the tool, and stamp image.
Now, place the plastic over the main focal image.  When the placement is exactly where you want it to be, move your tool up to the corner of the plastic, and be sure that nothing moves.  When it's exactly where you want it, remove the plastic....
and replace the plastic with your inked stamp.

Your sentiment should be exactly where you wanted it to be!


I should add that the green band at the bottom of the example card is simply a piece of a muse cardstock, cut to size, scored repeatedly, and sanded.  

Thanks for stopping by today!  Hope to be by soon to visit with you, but the lightning has begun again, so it might be a while!

Blessings,
Patti J.