Showing posts with label Kaiser Crafts. Show all posts

Sunday, August 3, 2014

Birthday Bash!

Good morning!
I think I must be dreaming again - how lucky I am...

For the month of August, I will be guest designing for Great Impressions Stamps!
Great Impressions was actually one of the very first stamps that I used many years ago,
when I was becoming so hopelessly addicted to this hobby.  It's fun to be
working with them again!

Today begins the monthly challenge at the Great Impressions Blog
The theme for August is 'Birthday Bash'.  
Here's what I created:

I used Lilly's Garden Time SKU #H10 for my card. 

Here is the card opened up.  The sentiment is Bouquet of Wishes  SKU #D456

Here is a shot of the 'card' opened.

This fun little card is only 2" wide.  I used a punch on each end, and created an easel card.
She's already been mailed to our church secretary!

We'd love to see you join us for the August challenge!
Be sure to check out the challenge rules - you need not use a Great Impressions stamp to enter!

Hope to see you there,

Patti J.

P.S. While out and about, be sure to 'Like' the Great Impressions' Facebook page, and follow the Great Impressions Blog!  The inspiration is incredible - what a talented group of designers they are!!!


Other Supplies Used:
White Cardstock (Hammermill 110#)
Black Cardstock (Hobby Lobby)
Pink Cardstock (Colorbok)
Perfect Papercrafting Mini Rulers for perfect mats (check out my sidebar for details!)
Paper Loft Patterned Papers 'Truly Scrumptious' collection
Ribbon from my stash
Copic Markers
Stampin'Up! Scallop Tag Punch
Kaiser Craft Pink Pearls

Wednesday, July 23, 2014

Shadow Stamping

Happy Wednesday!
Today, I am super excited to be hosting the Mod Squad Challenge.
Any of you that know me well, know that I'm a lover of 'techniques', so my challenge 
is to create something using the 'Shadow Stamping' technique.

Supplies Used:  Gina K. Designs Stately Flowers 8, by Melanie Muenchinger, Gina K. Designs Pure Luxury White Cardstock (MY LAST PIECE - EEK!!!), Tim Holtz Distress Inks, Tattered Rose, Victorian Velvet, Foam Dots, Kaiser Craft Pearls, A Muse Cardstock (Mat), Perfect Papercrafting Mini Rulers (see sidebar for details)

For my card today, I've used Melanie Muenchinger's 'Stately Flowers 8', which can be found at 
Gina K. Designs. This set is gorgeous - I am totally in love with all of Melanie's flower sets, and her basket sets are amazing, too!  When I win the lottery, I shall own them all :)  This set was in my
mailbox this week - a gift from Melanie.  You should have seen my Post Office happy dance!
Thank you Melanie - you are so kind and generous!

If you have never shadow stamped, you will have fun with this.
Find a stamp that would look nice with a shadow.  Stamp it once in a darker color,
then stamp again, moving the image slightly, to create a shadow image.
If you are a visual learner, Gina has a great video on StampTV, showing this technique.
If you've ever been stumped on a monochromatic card challenge, this technique would be perfect!

Thanks for stopping by - hope that you will try this technique,
and play along with this challenge at the Mod Squad Challenge Blog!

Can't wait to see your creations!

Hugs & Blessings,
Patti J.

Tuesday, July 22, 2014

Feel Better...

Howdy!
Decided to spend a few minutes creating 'just because', and join in on the 'clouds' challenge

Here's my card:

Supplies Used:  Gina K. Designs: Melanie Muenchinger's 'Fabulous Frame, Theresa Momber's 'Vertical Greetings 2', Gina K. Designs Pure Luxury White cardstock, Tim Holtz Distress Ink, Versafine Brown ink, Copic Markers, Kaiser Craft Pearls

Hope your week is going well!
Thanks so much for stopping by!

Hugs,
Patti J.

Monday, July 7, 2014

Pretty Wings...

Hello!
It's my day to bring you some Die-Versions goodness!

This card is made with the Die-Versions "Pretty Wings" Die.  This is one of the prettiest butterfly dies that I've ever seen, and was so excited to see it in my last envelope from Die-Versions!

This shot shows the card closed.  This is a 6 x 6 card base.  I've measured in from
each side about 1.5 inches, and cut up to the fold on the card base.  The flaps
on the sides were adhered to the card back, leaving only the center
as a fun little easel!
The small strip in the center is actually the "Crochet Lace" Die (DVW-322).
I've cut it out, and cut it in half, placing each half together, and covering the
seam with a ribbon scrap.  I totally LOVE this border die!
Die-Versions "Pretty Wings" Whispers DVW-383

Now, here's a view with the easel up.  Isn't that just the most fun?
The sentiment inside says "Wishing you a blessed & wonderful day".


Next up is a FUN and girlie card!  I've always LOVED shoes - wish my old feet would still
tolerate heels like these!  This die, "Shoe Collection", is so great - the set has every one of these shoes!
Of course, it can be cut apart if you want to use just one shoe, but as it's small, I just left it together,
punching a set of each color.

The sentiment on this one is computer generated.

This 'Diva' release was so much fun!  I can't wait to create with these dies again!
Hope you'll head over to the Die-Versions store and see what's new!
While you're out and about, check out the Die-Versions Blog - there's lots
of daily inspiration to be found there, by the DV Dynamo's!

Thanks for stopping by,
Patti J.

Other supplies used:
Bazzill Cardstock
a|muse Chevron Cardstock
KaiserCraft Pearls
Black Nailheads (Michael's)
Our Daily Bread Designs "Flourished Verses"
Sherri Baldy "Besties" Image
Tombow Adhesives
Black Cardstock (Hobby Lobby)
White Cardstock (Hammermill 100#)
and, of course... my Perfect Paper Crafting Perfect Layers Mini-Rulers for my mats
on the pink card! (see my sidebar for details on how you can save money!)

Saturday, November 2, 2013

One Stamp, Three Ways!

Good morning! 

It's my day to post for Scraptownlady, and another lovely Flourishes set called to me. I thought I would show you how much fun it is to use a stamp set in different ways.  Here are my cards:

The first card was created by simply coloring the image, mounting it on a piece of pretty designer paper, and adhering it to the card base.

For this card, the image was stamped with a colored distress ink.  Next, the sentiment was stamped in a darker distress ink, directly over the image.  The panel was mounted on pretty paper, then adhered to card base.

Last, but not least, I masked off the upper portion of this card.  The beautiful image was stamped repeatedly in black ink, until the lower portion was covered nicely. A pretty black ribbon, and a few pearls were the perfect finishing touches!

Designer's Tip:  Don't be afraid to think outside the box!  Just because it's a flower image, doesn't mean it has to be colored and 'over'embellished! 

Don't forget to do some of your Christmas Shopping at Scraptownlady!  She has beautiful papers, stamps, embellishments, tools, and much more!  You can find small stocking stuffer items, or larger items like dies! You can also become a follower of the Scraptownlady Blog!  There is new inspirations from Cheryl, and the DT several days each week!

Thanks for stopping by today!  It is an exciting weekend for us.  We are soon to be first-time grandparents, and our daughter is flying in from Germany tomorrow, for her one and only baby shower!  Her in-laws are flying in from Phx., and our son and his fiance from Calif., so it should be a wonderful weekend filled with friends and family!  I've been MIA lately, as I've been busy creating, cooking, cleaning...you know the routine!  Will have lots of photos next week!

Patti J.

Scraptownlady Supplies:
Flourishes 'Picking Wildflowers
Snug Hug Seam Binding - Black
EZ Runner Permanent Two Sided Adhesive
Kaiser Craft Pearls - Black
Pink Paislee Cottage Farms - Bushel - Designer Paper
Little Yellow Bicycle 'Vintage Summer' Paper

Other Supplies:
Black Ink
Perfect Layers Rulers (see sidebar for details!)
White Cardstock (generic)

Saturday, September 21, 2013

Where?

Good morning, and Happy Happy WEEKEND!

I'm here to share a creation today using lots of brand new Scraptownlady supplies!  Oh my goodness, what fun it was to get my 'fall' box.  I had ordered this sweet summer image, and decided that I should hurry and use it before we get totally into fall and Christmas.  Isn't she precious?  She's a Marianne stamp, and she's one of the adorable Snoesjes girls!  You could color her so sweetly with your choice of mediums! Colored Pencils, Spectrum Noir, Copic, Tombow, or StampinUp Markers....whatever you have on hand!
You can find here HERE!

Here is the easel card all set up.  Isn't she adorable?

This is the inside of the card - all Bo Bunny Goodness :)

And, of course, she folds flat for mailing!

Hope that she brought you a smile today.  I just couldn't wait to get her inky! 

Thanks for looking - hope you'll dash over to the Scraptownlady store and do a bit of shopping.  Cheryl offers an EVERYDAY 20% discount on EVERY order, and if that's not enough, she also charges ONLY the actual shipping costs on each order!  Pretty cool, right?  We'd love for you to follow our blog, too!

Have a great weekend,
Patti J.

Designer's Tip:  When creating a 6 x 6 card or layout, it's fun to make a 6 1/8" square box out of something sturdy, for mailing.  The recipient loves getting a 'present', your card is protected, and you get to show off your box making skills!  It's VERY easy!  Look for a photo tutorial with dimensions next week!

Scraptownlady Supplies:
Marianne Design 'Snoesjes' Clear Stamp
Kaisercraft Blue Haze Cardstock (Base)
Bo Bunny 'Prairie Chic Yard Sale' Collection (LOVE!!!!)
Snug Hug Seam Binding White
Prima Flowers 'Zephyr Collections Perles'
Scotch Quick Dry Adhesive
Summer Stick Pin - Lipstick Red

Other supplies:
Copic Markers

Saturday, September 7, 2013

A Ladies Diary

Hello, and Happy Weekend! 

It's my day to post for Scraptownlady, and I've chosen to use some of the beautiful collection from Graphic 45, "A Ladies Diary".  This card was SO easy - just some cutting, matting, fussy cutting, and voila!

This is the card front. Even the lace trim is G45 Patterned Paper!

This is the inside - I used another G45  Patterned Paper that is Kraft on the back side for my focal panel. The large rose was fussy cut from a sheet of the "A Ladies Diary" Collection, and glued down.


Be sure to check out the fabulous inventory of pretty papers, stamps, embellishments, adhesives, etc., at the Scraptownlady Store, and we'd love for you to follow the Scraptownlady Blog!!!

Thanks for stopping by today!

The winner of the Impression Obsession Bird Dies from Scraptownlady is BEA!  Congratulations, Bea! Thanks for signing up to follow the Scraptownlady Blog!  Please email me with your mailing information, at: mamagilliam at gmail dot com.

Hugs & smiles,
Patti J.

Scraptownlady Supplies:

Graphic 45 "A Ladies Diary" Collection
Scrapbook Adhesives EZ Runner
Scotch Quick Dry Adhesive
Petaloo Flowers, Chanatilly Velvet
Snug Hug Seam Binding, Zircon Green
KaiserCraft Pearls, Chino

Other Supplies:

Colorbok Black Cardstock
Perfect Layers Rulers (see sidebar for details!)

Thursday, September 5, 2013

Happy Birthday!

A few months ago, Cheryl Saforek, owner of Scraptownlady contacted a few of us, with an invitation to join her first Design Team.  What a fun few months it has been!  We teamies have become friends with each other, are having fun watching each others children grow up, and of course, we've had a great time designing with our Scraptownlady products!

Today is Cheryl's Birthday, and we are here today with a Birthday Hop in her honor!  She is a wonderful boss, and has become a very good friend, as well.

Cheryl, we hope that your day is as special as you are! Happy Birthday!

Here is my card for Cheryl:

Front of card.

This shows the popped up birthday cake in the inside center!
Just a close up of the 'candles' that prove Cheryl is 29 today!!! We are the same age :)


Now, I hope that you will hop on to Rebecca's blog!  Rebecca and Cheryl live near one another, and are friends outside of blogland - I can't wait to see what she has created for Cheryl!

In case you get lost, here is the hop order:

Scraptownlady Blog
Marcia
Cathy
Dawn Rene
Rhonda
Patti J. (me!)
Rebecca

Thanks so much for hopping along.  Please stop over at the Scraptownlady Blog, and wish our special lady a very Happy Birthday!

Thanks for stopping by,
Patti J.

Scraptownlady Supplies:
Authentique 6 x 6 Bundle 'Hope'
Kaisercraft Sparklets 'Daffodil'
Kaisercraft 75 cents Collection 'Sixpence'
Glossy Accents

Other supplies:
Martha Stewart Butterfly Punch
a muse Brown Cardstock
Stampendous Glitter

Friday, August 16, 2013

Thinking of You Today

Good morning!
It's Friday, and my day to post for the Scraptownlady Blog.
I've had some blogging friends ask me to consider doing some clean and simple projects using Scraptownlady supplies, and decided to do so for today's post!
Hope you like them.

6 x 6 Greeting Card, created from Melissa Frances papers and stickers, and ZVA Creative Embellishments


KaiserCraft papers, some solid cardstock, and a sentiment.  Voila!  The matching envelope makes this a fun, masculine greeting.

Isn't it amazing how much magic a sheet of pretty paper can create?  And that fabulous Kreate-a-Lope is a must have for making matching envelopes!

Have a wonderful weekend, and don't forget to hop over to the ScrapStownlady store - Cheryl adds new items nearly every day!  If you like what you see at the blog, be sure to sign up to follow.
We love new friends :)

Thanks for stopping by today,
Hugs and smiles...

Patti J.

Friday, August 9, 2013

Bling....Bling....

Happy Friday!
It's my day to post at the ScrapTownLady Blog, and I have a cute project to share.  Hope you like it!


A year or so ago, while I was shopping, this very gaudy, very blingish frame was free with purchase at a ladies clothing store.  I tried to tell the sales clerk that I didn't need it, but she insisted that it was free, and that it was going home with me.  It did, and it has been in its own little spot on a shelf in my girl cave since then.  When Cheryl got thes fabulous Prima Doll stamps in, I knew that I'd found a great use for this frame!

The Prima beauty was stamped on white cardstock, and stamped again, on several sheets of designer papers (listed below).  I then cut out sections from the designer papers, and pieced my original stamped image.  Paper Piecing is one of my favorite techniques, and just seems so perfect for these ladies.  After coloring the crown and belt, I added a bit of sparkle with a glitter pen for some additional bling. The sentiment (Flourishes) was stamped and matted, using my Perfect Layers Tools (see sidebar for details), and another piece of designer paper was fussy cut, and added to the bottom right corner for a bit of pizazz!

Thanks so much for stopping by!  Be sure to check out the ScrapTownLady store, and pick out your own Prima Girl to create with!

Have a great weekend,

Patti J.

ScrapTownLady Supplies:
Prima Julie Nutting Doll with Strapless Dress
Flourishes Stamps 'Sweet Days of Summer'
KaiserCraft Lavendar Haze 6.5" x 6.5" Paper Pad
KaiserCraft Chapter One 6.5" x 6.5" Paper Pad
ZVA Creative, Pink Flourish
EZ Runner Permant Adhesive
Glue Dots Mini

KaiserCraft 'Sweet Nothings', 'You & Me' (no longer in stock)


Other Supplies:
Frame
Copic Markers 
Perfect Layers Rulers (see sidebar for details!)

Thursday, August 1, 2013

Card & Sketch-abilities!

Happy 1st day of August!  It's Thursday, and my day to post for the ScrapTownLady Blog

We are so excited that The ScrapTownLady blog is sponsoring our friends over at Sketchabilities and Cardabilities for the August 30th reveal!
What does that mean for you?  Not only fabulous inspiration with the amazing sketches that they have to offer for Scrappers and Card Makers, but also two opportunities to win a very generous gift certificate to the ScrapTown Lady store in the amount of $50. 

That's right, two gift certificates are up for grabs, so be sure you enter for your chance at a really fun shopping spree! You will find the entry forms over on the right sidebar of the ScrapTownLady blog, for both.
Here are my projects for the reveal:

Sketchabilities Sketch #96:
Above is my layout.  I am so NOT a scrapbooker, so this layout was WAY outside my box!  Giggles allowed!

Cardabilities Sketch #80:
Here is my card.  Of course, being the rebel that I am, I just 'had' to flip things up a bit!

Thanks so much for stopping by today!  Be sure that you play along with these amazing sketches, over at Sketchabilities or Cardabilities!

ScrapTownLadySupplies:
Layout:
Impression Obsession Leafy Branch Die
My Mind's Eye Lost & Found 3 Collection
Want2Scrap Creme Pearls
Petaloo Chantilly Collection Flowers
La-La Land Crafts Summer Marci 
Scotch Quick Dry Adhesive
EZ Runner Adhesive
Other Supplies: Copic Markers, Memento Tuxedo Black Ink

Card:
KaiserCraft Chapter One 6.5 x 6.5 Paper Pad
KaiserCraft Cardstock
Flourishes 'Sweet Days of Summer' Stamps
Tim Holtz Broken China, Crushed Olive, Peeled Paint Distress Inks
Petaloo Chantilly Collection Flowers
May Arts Ribbon
Want2Scrap LaCreme Pearls

Scotch Quick Dry Adhesive
EZ Runner Adhesive
Other Supplies: Versafine Black Ink


One last thing....one day last week, I posted these Prima Doll Tags on my blog.  Did you know that you can buy lots of Prima dolls at ScrapTownLady?  She has the dolls, the tags, even the stamp that was used to embellish the red dress on my 1st tag!  Check them out, HERE, and HERE!


Hugs and smiles!
Patti J.

Thursday, July 25, 2013

Summer...

Hello!  It's Thursday, and I'm here today with my weekly post for the ScrapTownLady blog.  I have a fun card to share with you today - let's 'roll' right along here...


The hills were just cut, freestyle.  No ryhme or reason.  The first layer was adhered directly to the card front. The next two layers were each adhered with foam, for added dimension.  Sadly, the bike is out of stock, but be sure to check out the store - there are lanterns, birdbaths & birds, etc.  Lots of other options!

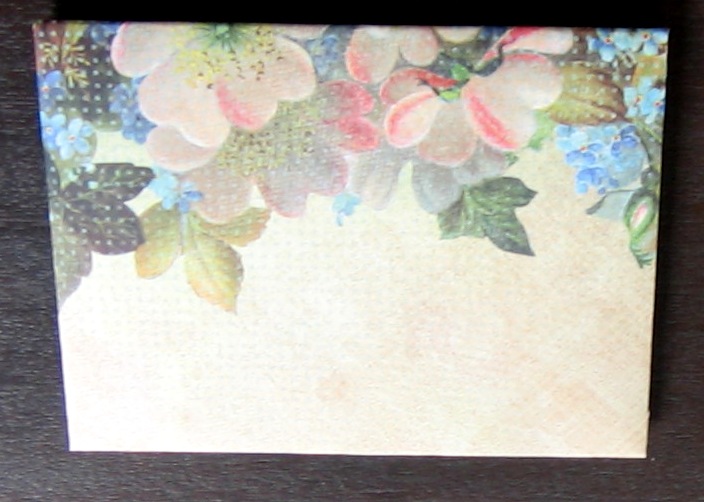
One more share for the day - ScrapTownLady now carries the Kreate-a-Lope!  Talk about an easy, fun way to create your envelopes!  You can adjust the envelope opening exactly where you want it, so you have a fun and creative place to display your recipients address, too!  Check it out:

Start by aligning your template where you choose.  I wanted to end up with some lovely flowers on my envie front, so you can see that I placed the opening over the flowered area.

Holding the template firmly in place, begin tearing.

Continue tearing, all the way around each edge.

Now you will place the template on the back side, matching your torn edges.

Place the rectangle template in the center of your first template.

Begin by folding in your side edges.

Next fold up and adhere the bottom edge.

Last, you will apply the Lick and Stick Envelope Glue (sold at ScrapTownLady), let dry, and moisten when ready to seal envelope.

Voila!  Wouldn't this be pretty with one of your handmade cards tucked inside?

Hopefully, you are having a great week!  Mine's been good, so far... I may change my mind after my morning dental appointment today!

Thanks for stopping by!  I hope you will become a follower over at the ScrapTownLady blog - each day promises lots of inspiration, and we have guest designers every Sunday!

ScrapTownLady Supplies (Bike Card):
Impression Obsession Hydrangea Stamp Set (Flowers stamped onto tree)
Impression Obsession Hydrangea Dies (Flowers in basket of bike)
Impression Obsession Bare Tree Die
Impression Obsession Clouds Dies
Impression Obsession 'Summer' Stamp
Melissa Frances Shabby Chic Treasures "Bike"
KaiserCraft Lavender Pearls
Tattered Rose Distress Ink (Flowers)
Dusty Concord Distress Ink (Flowers)
KaiserCraft 'Powder Blue' Cardstock (card base)
Scrapbook Adhesives Foam Squares
KaiserCraft 75 cents 'Sovereign' Designer Paper
KaiserCraft Lavendar Haze 'Thistle' Designer Paper
KaiserCraft Lavendar Haze 'Mulberry' Designer Paper

Other Supplies:
Memento Tuxedo Black Ink (sentiment)
Dotted Swiss Embossing Folder (clouds)

Kreate-a-Lope
Lick & Stick 


Hugs,
Patti J.

Thursday, July 11, 2013

Thinking of you...

Good morning!  Today is my day to post for the ScrapTownLady Blog. I can't believe what a great variety of stamps she carries in the ScrapTownLady store!  I chose to work with this fun Stampendous image today. Just thought something a bit 'girly' seemed like a good plan.


This image was so much fun to create with. I wish you could see it in real life.  There's a touch of sparkle, lots of gloss, and a nice, rich color.  The color was painted on, using Tim Holtz Distress Inks, and a water brush.  Reminded me of being a kid, and playing with my watercolors!  Painting was great therapy, too, as it's been a week of sadness, having lost a friend to cancer. KaiserCraft makes such gorgeous papers, and it was fun searching for just the right combination - it needed to look elegant, a bit vintage, and even a little sassy!  Used my Perfect Layers Rulers for that beautiful 1/8" white border (see sidebar for details). Hope you will head over to the store, and purchase this stamp yourself.  Can't wait to see your creations!

ScrapTownLady Supplies:
KaiserCraft 6.5 x 6.5 'Lavendar Haze' Paper Pad
Impression Obsession Stamps (sentiment) 'Hydrangea Set'
Stampendous Stamps 'Cling Rose Corset'
Prima Flowers 'Pixie Vine Fairy Belle'
Tim Holtz Distress Ink 'Tattered Rose & 'Bundled Sage'
E-Z Runner Adhesive
Scrapbook Adhesive 3-D Foam Adhesive
Ranger Inkessentials Glossy Accents

Other Supplies:
Black & White Cardstock
Perfect Layers Rulers
Kuretake Wink of Stella 'clear'

Designer's Tip:  If you are using a stamp that is larger than any acrylic blocks that you have, grab one of your Cuttlebug Plates!  The stamp will stick to it perfectly, it will wipe clean, and you won't have to invest in a larger block!  

Thanks for stopping by today!

Have a great day,
Patti J.

Thursday, July 4, 2013

Hello!

Hello!

Today is my day to post for ScrapTownLady's blog, and I have a couple of cards to share.  As today is Independence Day in the U.S.A., it felt right to use more of the beautiful red, white, and blue papers found in the ScrapTownLady Store.  This card is sort of a 'half' easel card.


To make this card, simply create your card - this is an A2 card, but any size works.  Score your card front at the halfway point, and fold downwards.  Ta Da!

This photo is looking down on the card, so that you can see the "Pride" sticker that holds the easel in place.
 It was fun to use the I-O grass die for the appearance of 'fireworks' in the background!
Here you can see that the entire top half is blank for your own personal message.

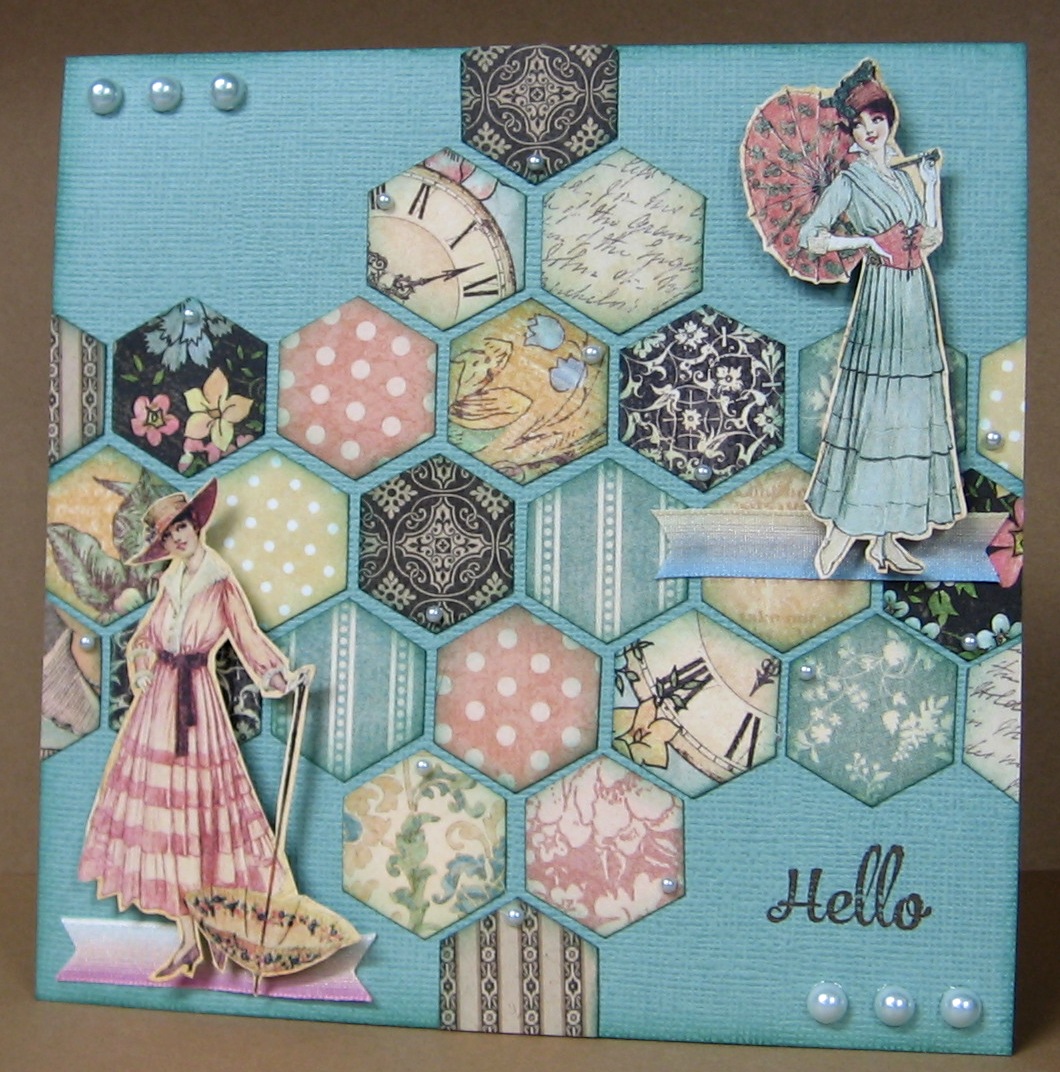
The next card was fun.  I've so badly wanted to create with some of the Graphic 45 papers that Cheryl sent me, but couldn't choose which piece to use....so I used nearly all of them!
 
 
Hexagon dies are not something I own, so I dug around, and found this old plastic template.  As it has M's on it, it probably belonged to our daughter, when she was in grade school!  Guess it pays to be a hoarder (grin).

The next step was to cut the hexagons out, distress with some Pine Needles Ink on a sponge dauber, and make a fun layout with them.  Last, a scrap of ribbon for each fussy cut lady, a few pearls, and a stamped sentiment completed this quick and easy creation!

Hope that you've all had a great week, and have a wonderful, safe day today!

ScrapTownLady 'Sweet Land of Liberty' Supplies:
Authentique "Pride" DP Collection
Authentique "Pride" Components (Sticker)
Impression Obsession 'Circle Shaker' Die
Impressions Obsession 'Sweet Land of Liberty' Stamp
Impression Obsession 'Grass Border' Die
Impression Obsession 'Spiral Daisy' Die
Want2Scrap Red Pearls
E-Z Runner Adhesive
Scotch Quick-Dry Adhesive
May Arts Navy 5/8" Ribbon

Other supplies:  Amuse CS

ScrapTownLady "Hello" Supplies:
Kaiser Craft 'Frost' Cardstock
Kaiser Craft Pearls 'Bliss'
Impression Obsession Stamp 'Hydrangea' Set
Tim Holtz Distress Ink 'Pine Needles'
Graphic 45 'A Ladies Diary' Collection
Jumbo Dauber

C'est Jolie Ruban Variation Ribbon
Other supplies: Versafine Brown Ink


Happy 4th of July to you all!

Thanks for stopping by,

Patti J.