Hi everyone!
It's my day to share a Project of the Week here on the Repeat Impressions Blog, The House that Stamps Built. I'm going to share a super easy, clean and simple card, that you can create
for any occasion! Since it's still winter, and we're expecting sleet and snow this weekend, I decided to use the Repeat Impressions 'Let it Snow' 2006-H, and 'Snowflakes' 8805-K.
To begin, cut panel to desired size. Place a straight edge across your panel,
and lightly draw a pencil line on each side of your straight edge.

It will look like this:

Next, trim some post it notes, or masking material of your choice, and mask off
the section that you just created (sorry, this photo appears to be upside down!)

Using stamps and inks of your choosing, stamp randomly over the white space,
being sure to overlap your mask now and then.

Remove the mask, and it should look like this:

Gently erase your pencil lines, once your ink is dry.
I have to get a bit excited here - my BEAUTIFUL eraser was part
of my Christmas present from my bestie, Shirley! Isn't she
just awesome?

I use a Stamp-a-ma-jig when I want to get a perfect placement, so
that was my next step. I stamped Let it Snow on the plastic sheet....
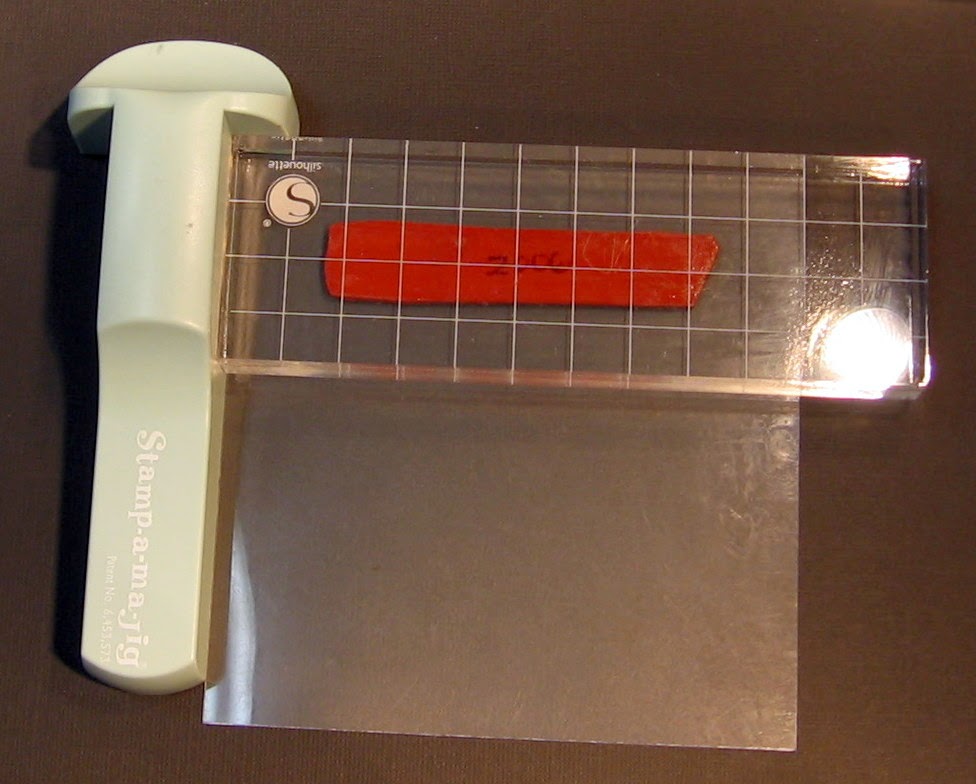
It will look like this:

I removed the plastic sheet, and replaced it with the stamp, and stamped onto the
white space on the card panel with gray ink.

Here's what it looked like:

I decided that it looked a bit 'blah', so I lined up the plastic sheet once again,
moved it a bit to the left, and stamped again, using pink ink. Much better, right???

At this point, you can do nothing, you can draw a border line, cut a cardstock borderline,
OR add some glitter! Since I love, love, love glitter, I added a couple strips of
double sided adhesive, and.....

sprinkled with beautiful, sparkly, snowy, glitter!

For the last step, I used my Perfect Papercrafting Mini Rulers (see sidebar to find out how you can get a free cutting mat) and cutting mat, and put a pretty pink mat behind the focal panel,
and mounted that on a gray card base.

So, what do you think? Imagine wee bugs, with a fun sentiment, or flowers, with a birthday sentiment - you can see that the possibilities are endless!
If you decide to try this out, let me know, so I can come check out your
beautiful creation!
Hope you'll follow us at The House that Stamps Built for loads of inspiration, and fun challenges! There's always a chance to win some wonderful Repeat Impressions stamps!
If you are in the mood to shop a bit, be sure to check out my sidebar to see
how you can save some money on your next order at Repeat Impressions!
Thanks for stopping by today!
Hugs,
Patti J.
23 comments:
Fantastic, thanks for the tutorial!!
Ohhhhh this turned out gorgeous! I love it!!!!!
Patti, great tutorial and a great design. Must try this. Thanks!
OH Love it - so simple but such a pretty result, I think I might make one of these today. I have made them in the past and then just "forget" about the technique. Hoping we don't get any none zero snow!!!
WOW! This card is just beautiful Patti!! The added sparkle really puts it over the edge!! :)
Oh this is great! And I love how you showed how you made this! Love the sentiment on the angle!!
Wow! I got through to the comments! WooHoo! I love your project, especially how you added the glitter. Beautiful!
Fabulous card Patti! loving all the sparkle... Great tutorial too.
Absolutely gorgeous card, Patti!! I love the design!! Your tutorial is fabulous, too!! Have a great day :)
Lisa
A Mermaid's Crafts
This is really cute! I might be casing this one!
Super sensational project, Patti and I love the offset or shadow stamping effect on the sentiment.
Great technique, Patti! I especially love your colors.
Wonderful tutorial. You totally rocked it. Love your card. You are so talented my dear.
Beautiful card, esp. like the glitter lines! Enjoyed the tutorial!
Beautiful card, and so simple when you know how! Thanks for the step by step Patti
xx
What a fun, sparkly winter card!!! Love the idea of making the borders from double stick tape and glitter - Fun and totally genius idea!! Good for you - Enjoy your night!!!
What a great design, Patti! Love the addition of the glitter. Thanks for sharing your technique.
Love this idea for a one-layer card, Patti. I'll have to give it a try. Thanks so much for the fabulous tutorial. Off to visit Repeat Impressions and The House That Stamps Built sites now.
Stunning card, Patti. And I love the colour combo. I would have never thought to use pink and grey but look how beautiful it came out! Thanks for the great tutorial, my friend.
Hugs,
Lena
Lena’s Creations
A fun technique and a beautiful card, Patti.
Hugs
Sue
Thanks for the wonderful masking tutorial Patti! I really should get me one of those stamp-a-ma-jigs. Love the layout!
Beautiful card Patti!! Such a wonderful idea, thank you for the fab tutorial. Congrats on making the CardMaker DT, very well deserved. I am so happy for you.
Hugs,
Brenda
Such a pretty card. Love the soft snowflakes and the glitter strips. Thanks for the step-by-step pictures. :)
Post a Comment