Hi there!
I'm back today with a reminder that we are halfway through the month of May.
You still have time to join in the challenge on the Scor-Pal blog - just use your
favorite color combination and 'More than one fold'!
Imagine my surprise when I went to the mailbox and found a huge box FILLED with

I'm going to show you how to create this fun little treat box! Come...let's get started!

Again, turn your paper 90 degrees so that the 3/4" score is aligned with the top fence. Cut out the top left and bottom left squares. They are marked with an 'X' in the photo.

Cut on the 4", 5", and 8" score lines, from the top and bottom edges to the first horizontal score line. I trimmed in a bit on my 'tabs', to make my box come together in a neater fashion later, as you
can see in the photo.

Scallop one edge of the 1 1/2" by 9" piece of card stock. Decorate if desired.

Line the back of the 1 1/2" x 9" strip with Scor-Tape.
Remove Scor-Tape backing strips, and adhere border to box top at fold line.
(Note that my 'flaps are folded under so that the box will fit through my Big Shot
for the next step). Next, die cut a window in the front of your box.

Die cut your window frame from the additional piece of card stock. Line the back of
the frame with Scor-Tape.

Peel off the backing, and adhere the frame around the die cut window in the front of the box.
With your Scor-Tool, burnish all score lines for your work.

Open to the inside of box. Line the inside border of the window panel with Scor-Tape.
Line the outside edge of your transparency sheet with Scor-Tape.
Peel the backing off the Scor-Tape, and adhere the piece of acetate over the window opening.

Here is what your window will look like from that back side.

With your Scor-Tape, line the top edge of your paper. Then peel the backing off, and adhere the top edge down to the inside of the box.

Scallop both edges of the 1 1/2" x 6" piece of paper. You could further decorate with ribbon or
other embellishments if desired. This will be your box handle.

Adhere one end of the 1 1/2" x 6" piece to one side panel of the box. I used a 1/8" circle punch and a rhinestone brad to attach the box handle.

Line the 1" tab on the box side with Scor-Tape. Peel the backing off, and adhere it to form the box. Attach the other side of the box handle in the same fashion as the step above.

On the bottom of the box, line the small tabs with Scor-Tape. Peel the backing, and fold them in first.
Fold up the bottom of the box, adhering it to the tabs.

Line the remaining box tab with Scor-Tape. Peel the backing off the tape and fold the tab down, finishing your box.


favorite color combination and 'More than one fold'!
I have two favorite color combinations:
Pink, white, and navy or black
Red, turquoise, black and white
I chose to use the Pink, white, and black color combo for my project.
Imagine my surprise when I went to the mailbox and found a huge box FILLED with
beautiful 12 x 12 cardstock and papers that DCWV had generously sent to Scor-Pal Owner, Diana Crick for us to design with!
This delightful DCWV 'Peri & Peach' patterned paper jumped right out of the box,
so it was meant to be!
We've been asked to go into the Scor-Pal archives, and re-make some of the older tutorials that were done with the original Scor-Pal. I chose to re-make a project that Toni Storie featured HERE.
Here's my version of Toni's project that I made using my Scor-Pal and Scor-Tapes:
Here's my version of Toni's project that I made using my Scor-Pal and Scor-Tapes:

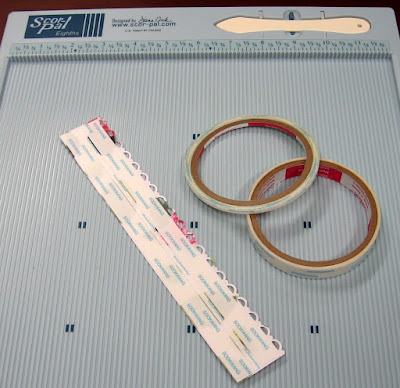
For this project you will need:
One piece of card stock or patterned paper that measures 9" x 6 3/4"
One piece of card stock or patterned paper that measures 1 1/2" x 6"
One piece of card stock or patterned paper that measures 1 1/2" x 9"
One piece of Acetate that will be larger than your window opening
Additional card stock for window frame
Scallop edge punch or die
Die cut for creating your window (a punch or craft knife would work as well)
Place your paper in your Scor-Pal Eighths with the 9" side up against the top fence.
Score at 1", 4", 5", and 8". Then, turn your paper 90 degrees and score at 3/4" and 5 3/4", as shown.

Again, turn your paper 90 degrees so that the 3/4" score is aligned with the top fence. Cut out the top left and bottom left squares. They are marked with an 'X' in the photo.

Cut on the 4", 5", and 8" score lines, from the top and bottom edges to the first horizontal score line. I trimmed in a bit on my 'tabs', to make my box come together in a neater fashion later, as you
can see in the photo.

Scallop one edge of the 1 1/2" by 9" piece of card stock. Decorate if desired.

Line the back of the 1 1/2" x 9" strip with Scor-Tape.

Remove Scor-Tape backing strips, and adhere border to box top at fold line.
(Note that my 'flaps are folded under so that the box will fit through my Big Shot
for the next step). Next, die cut a window in the front of your box.

Die cut your window frame from the additional piece of card stock. Line the back of
the frame with Scor-Tape.

Peel off the backing, and adhere the frame around the die cut window in the front of the box.
With your Scor-Tool, burnish all score lines for your work.

Open to the inside of box. Line the inside border of the window panel with Scor-Tape.
Line the outside edge of your transparency sheet with Scor-Tape.
Peel the backing off the Scor-Tape, and adhere the piece of acetate over the window opening.

Here is what your window will look like from that back side.

With your Scor-Tape, line the top edge of your paper. Then peel the backing off, and adhere the top edge down to the inside of the box.

other embellishments if desired. This will be your box handle.

Adhere one end of the 1 1/2" x 6" piece to one side panel of the box. I used a 1/8" circle punch and a rhinestone brad to attach the box handle.

Line the 1" tab on the box side with Scor-Tape. Peel the backing off, and adhere it to form the box. Attach the other side of the box handle in the same fashion as the step above.

On the bottom of the box, line the small tabs with Scor-Tape. Peel the backing, and fold them in first.
Fold up the bottom of the box, adhering it to the tabs.

Line the remaining box tab with Scor-Tape. Peel the backing off the tape and fold the tab down, finishing your box.

Voila!
You have an adorable little treat box for any occasion!

We'd love to see your project linked up on our challenge this month!
I'm having so much fun with these products! With all of the fun and amazing products
that have come and gone during the many years I've been paper crafting, my Scor-Pal products
are something I reach for with nearly every project. I'm so excited to have the new Scor-Pal Eighths board with the scoring grooves at every eighth inch. It makes everything so easy!
Thanks for stopping by - have a great weekend,
Patti J.
8 comments:
Love this, may have to make a few.......
This is gorgeous!!!!!!!!!!!!!!!!
Such a cute candy treat bag!
Cute treat box - but then you can make any type of box. Great job and great tutorial
Thanks for your easy-to-follow tutorial. This is such a darling project. I love the DP you used. You rock.
What a wonderful treat bag you created. Perfect for giving someone a few goodies!
All the little details this project are amazing! Thanks for the inspiration!
Oh wow, what a beautiful treat bag Patti! Love that DP and thanks for the step by step too! xx
Post a Comment