Our Brand Ambassadors are the heart and soul of Perfect Paper Crafting! They are all truly AMAZING artists. The hop starts today, Monday, March 31 at 9:00 a.m. PST and will go through Friday, April 4 at Midnight PST.

We thought we would do a blog hop so you could see our Brand Ambassadors' artistic talents showcasing our newest products. We will show you how to use our new Perfect Layers Mini tools and Perfect Cutting Mat. We are very lucky to have SugarPea Designs as one of our sponsors for this fun blog hop. SugarPea Designs is giving away a $25 gift certificate to their new on line store to one lucky winner. Also to celebrate our very first Perfect Paper Crafting Brand Ambassador blog hop, Perfect Paper Crafting will be giving away a $50 gift certificate to our on line store. All you have to do is visit all of the participating blogs and leave a comment on every single one. We will announce the winner Sunday, April 6. I hope you enjoy!
Thanks for stopping by today - the next stop on the hop is Cathie Rigby
Here is what the cutting mat and mini tools look like.
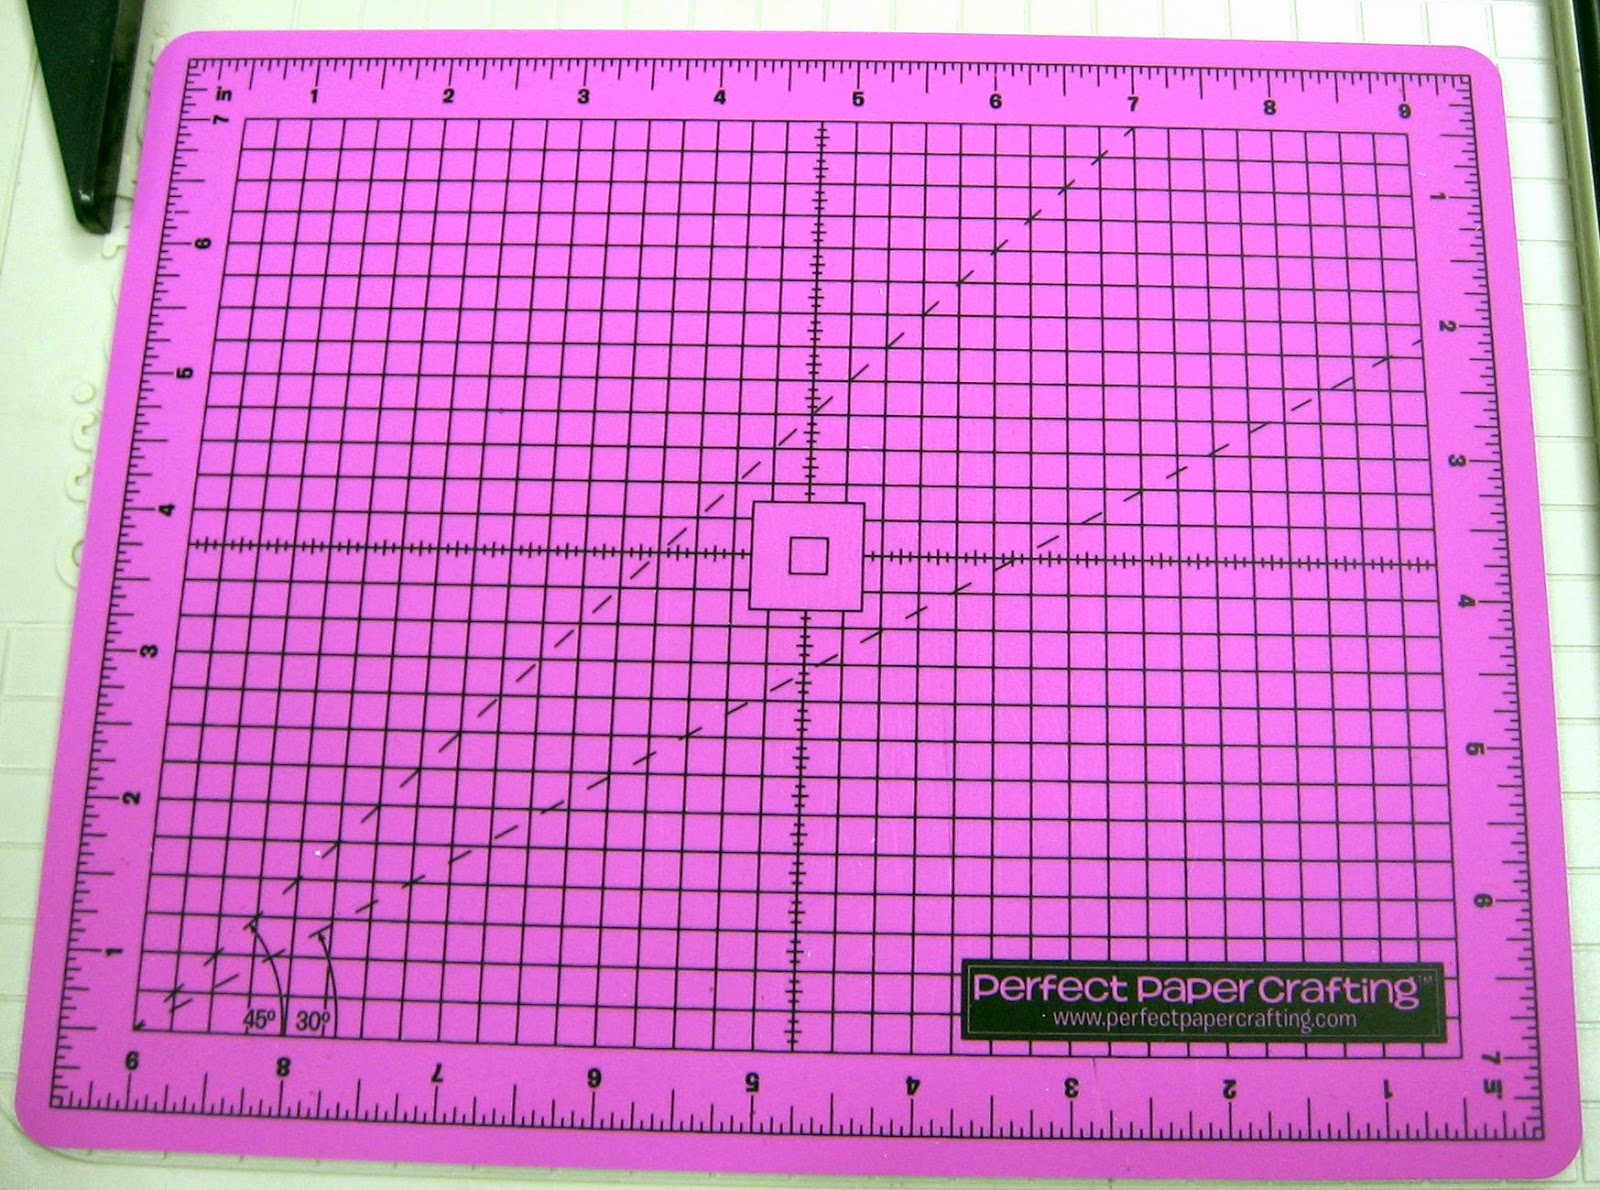 |
| Note that one side is in inches, the other side is metric. Look at all of the great information on each side, too! |

I still love my full size tools, but I REALLY love these mini tools! They travel beautifully to crops, or girl's day in crafting sessions, and I feel that I personally have more control with the smaller size. The mat is amazing - makes for a perfect cut every time.
 | ||||||||||||
| If you look closely, you will see that there are edges on each side with different widths. The first ruler has 3/16" and 5/16" on the front side, and 1/2" and 1/16" on the other side. The second ruler has 5/8" and 1/8" on one side, and 1/4 and 1/4" on the other side. Now.....here is what I made using the Perfect Cutting Mat and the Mini Tools:
|


 |
| Used a Sherry Baldi 'Besties' image for this one, and an Amuse Studio sentiment. Love the way it turned out! Note the 1/16" black border behind the pink panel, and the 1/8" border behind the center strip. |
 |
| For this card, I used several size mats. The image, sentiment, and sunburst paper are from Amuse Studio. I followed the sketch below, and will be entering this card in the Sketch Saturday challenge. |

If you'd like to try these tools yourself, check out my sidebar for details on how to save money on your own set!
Happy Hopping!
If you get lost along the way, you can find the entire blog list at Perfect Paper Crafting!
Have a great week!
Patti J.
51 comments:
These are so cute. Love all the layers of the second one.
Both of your cards are beautiful!! I love the sweet image on the first and the layers on the second!! You did a fabulous job with both of them!! Have a great day :)
Lisa
A Mermaid's Crafts
Such pretty and cute cards. Love them both!
Beautiful card and great visual too! ~Diane
Great cards, Patti! Your layers definitely always look perfect, and I love how they "finish" the cards so beautifully.
Patti, thanks for the tutorial. I love your creation.
The birdie card is beautiful :)
Beautiful creations, so fun and bright! TFS!
Leigh S-B of leighsbdesigns.blogspot.com
Loved all of your cards. The teenage girl caught my eye first. With 2 teenage granddaughters I could see them looking like that. Those years are great fun.
Great cards - really interested in how easy you make it look with the tools.
loyaz1@wbhsi.net
Love your cards...look great!
Wonderful Cards.....love the look of them..great tutorial on the tools.
Both of your cards very beautiful.
hugs, Helena
These are adorable, Patti. I love the new mini perfect layers. I so have to get them.
Patti both of your cards are wonderful I love the way the thin black mat on the first card really makes things pop and your second card wow!
What beautiful cards! Love the layers and how pretty they are.
I love how your cards turned out too! A great way to show off the tool and the perfect layers.
Man, I want those new tools! Great photo tutorial. Thanks! You did a great job on your cards. I especially like the second one!
I like how your layers turned out.
I love how your layers turned out.
Great job on your cards. TFS!
I love the colors you chose! Such cute cards! I also think you showcased the tool wonderfully!
I really want to try the template for the 2nd card it is very effective with all the mats and layers.
Wow, so bright and colourful--just my style. Thank you for showing us your precision cutting.
Very creative cards. I love the layout of the card with the birds. Great job!
really fun card, thanks for sharing, lovin those new mini's
Your cards are so cute!
Great post and enjoyed my visit!
Very pretty card Patti! I love how you extended that beautiful stamp image outside the matted block. Certainly looks like spring!
Thanks for sharing your lovely work! :)
Beautiful cards, Patti! Thanks for joining us for Sketch Saturday this week!
Awesome fab cards! Love the instructions on how to layer. Thank you.
Great cards...I soooo need this tool set!
adorable Cards! FUn hopping with you!
Such cute cards Patti. I am really thinking I need to get those Perfect Layers rulers!
Great Cards!
Great Cards!
Oooo . . . these are both so pretty! Love the cheery paper you used; it makes me feel like spring might really finally arrive. : )
Cute! And you finally did the Sketch Saturday Challenge, yeah!
First, your tutorial with the rulers is fantastic. I just got mine and it great to see I am doing something right. LOL I bought them for the very thing you demoed. For the thin borders!!! Your Bestie image is adorable and those borders are perfect for her. It's amazing how much better they are thin. Your second card reminds me of a pretty Spring quilt and again the borders really were perfect for each layer!!
Wow! The possibilities for the mini tools is endless!
What lovely cards and the layering done with the tool really makes such a difference to the finish of the card.
That is a fab tool! Love your pretty cards.
I love, love, love your cards! The colors, the images, everything. Wish I could put things together like that!
Cute cards!!! I now have to say that I've ordered a third set of perfect layers. I have my original set, a new set and now the mini. Thanks for enabling me!!!!!
Adorable! I particularly love the birds in the nest. Thanks!
Ooh, how cute is that? Aren't these wonderful?
www.purrfectionistcrafter.com
Patti, I maybe very late in commenting here. but I really want to thank you for this information and tutorial. I have these rulers, and was confused on the process of cutting.Mainly, I didn't cut my image size first before doing the frames. thanks again....have a good day.
Patti, I maybe very late in commenting here. but I really want to thank you for this information and tutorial. I have these rulers, and was confused on the process of cutting.Mainly, I didn't cut my image size first before doing the frames. thanks again....have a good day.
Not sure what happened to my comment. But I want to thank you for the tutorial on these rules. I have them and now understand better their usage...Love what you made with them. a beautiful card.
Not sure what happened to my comment. But I want to thank you for the tutorial on these rules. I have them and now understand better their usage...Love what you made with them. a beautiful card.
great sketch and love the card! thanks for the info on the tools!
Post a Comment