Hi everyone!
It's my turn to share a Pick of the Week at The House that Stamps Built. The Repeat Impressions Stamps that I picked to showcase are:
Here's what I made:
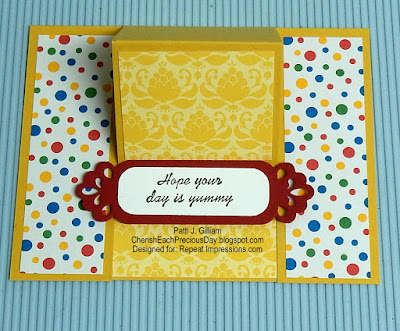
Some of you have said that you like my fun fold tutorials, so here you go! This is a fun version of an easel card, step card, etc. Lots of fun to create, and it folds flat into an A2 envelope for mailing.
Let's get started!
Decide first which images you want to work with, as you can create this card in either landscape or portrait mode. Color and either fussy cut, or panel cut your images - your choice! Mine are fussy cut. Set these aside until the end.
Cut cardstock 5.5" x 8.5" and score at 4.25" to form card base.
Measure over 1.5" from each side, and cut just up to the fold line.
This is what it will look like. Score the center section in half (2 1/8")
Cut a piece of patterned paper for the center section of your card, and adhere it. Be careful to allow if you are using a patterned paper. You want the pattern running the right direction. After you have adhered the patterned paper, carefully adhere both long flaps to the card base. In the photo below, you will see that I have them taped, and ready to simply fold forward onto the base.
Now your card looks like this! Add some patterned paper pieces to the side flaps - mine measured 1.25" x 4", and a piece of patterned paper to the 'easel' piece. Mine measured 2.25" wide x 2" tall.
Add 'something' to the card base using dimensional foam, to hold your easel upright.
Last, add your images! I colored my images with Copic Markers, and glossed them up a bit with some glossy accents to the cherries and sprinkles. Hmmm....now I am craving a cupcake.
And here is a side view:
Thanks for stopping by today!
Hugs and blessings,
Patti J.


8 comments:
Gorgeous card Patti, beautiful design, coloring and I like the cherries at the bottom!
Soooooooo cute! LOVING those cupcakes!
What a nice tutorial, I think I am going to try this. Good job on this weeks POTW
Another cute card and an easy to follow tutorial. The yellow cardstock is such a refreshing colour. I worked with it myself today. Your card is super cute!
That is a great card design with those yummy treats. I love it.
I LOVE this card, and I love your tutorials, too. You always have such clear and easy-to-follow directions. Thank you!
This is so cute! I have to do this one with the grandkids!
Oooo, Patti, those look good enough to eat! And they are the kind of cupcakes I need - no calories. :-D Wonderful instructions, my friend.
Post a Comment