Hello, my creative friends!
It's Monday...
And it's my turn to be the Project of the Week Hostess at the Repeat Impressions' blog,
I decided to try my hand at foiling. That's foiling with an 'O', not failing with an 'A', although, I must admit to many FAILED, foiled cards! lol... Practice makes perfect, so with enough
practice, I might get it right :)
I used these Repeat Impressions stamps for my projects:
10301 H Patti's Flower Solid (YEP! I drew this one!)
To get started, you will need:
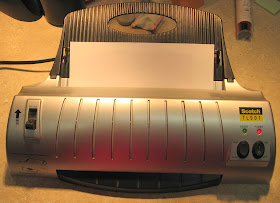
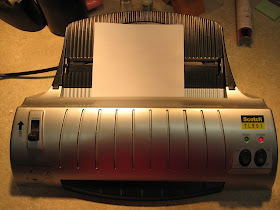
a heat laminator, Versamark Ink, and/or some really sticky two sided tape
stamps
cardstock
heat gun
First, turn on your laminator, letting it heat for quite some time - you will want it to
get as hot as possible.
Decide what image you want to use, and ink it up well with Versamark Ink.
I always rub my cardstock with an embossing buddy, or the embossing powder tool
to eliminate static prior to embossing. For this project, I used my MISTI tool,
in order to re-ink with Versamark a few times to get a good image.
Next, apply embossing powder to your cardstock.
Using your heat gun, heat the embossed image.
Here is what your panel should look like.
Fold a sheet of copy paper in half, lay your embossed cardstock panel face up, and
place your sheet of foil on top of the embossed image. The foil should be 'pretty' side up.
Fold the copy paper over the foiled panel, and run it through your laminator.
Turn the whole bundle and run through again.
Slowly peel the foil off .
Here is what the foiled panel looks like.
I decided that since I used an outline image, rather than a solid image,
it needed a bit more zing, so I did a bit of distress sponging over the foiling.
I also foiled a sentiment, and used some colored mats to complete this card.
Next, I decided to see what would happen if I used some two sided tape.
I taped a strip on my card panel, then did some embossed lines on either side using a
score board.
Peel the tape off, and add your foil. Rub in firmly with your fingertip.
Peel away the tape, and voila!
Here is how I finished that piece. I just kept adding score lines and foil, then trimmed
to fit my card front as desired. The flowers were stamped on with Versamark,
and heated through the laminator. Once the card base was finished, I
adhered the white panel with pop-dots to give it front and center attention.
None of these photos show how pretty the foiling is. In this photo,
I tried to capture the shine.
We hope you will give this a try! It will take some patience and some practice, but
a roll of foil comes with several sheets, and is approximately $4-$5, so practice to your hearts content! If you try this, come back and let us know - we'd love to see your finished
projects!
Thanks for your patience with all these photos!
Have a great day,
Patti J.


So vibrant and pretty Patti...Thank you for showing how it is done...I never did see the videos out there...so much more easier to see pictures!!
ReplyDeleteCheers
Dr Sonia
Such pretty and shiny cards Patti. Love the lovely flower background. The touch of gold looks great with the ink sponging. I have a cheap laminator, but it does the job. I have picked up some HS foil paper on clearance a while ago... I just have to dig them out. LOL! The multicolored lines look great on the second card.
ReplyDeleteThanks Patti! All of it is so pretty. Great job.
ReplyDeleteThis really looks amazing Patti!! I have tried different methods of using foil and didn't like it. Unfortunately, I don't have a heat laminator...so not sure if I want to invest in one of those or the mink machine to know if I'd use it that much, but the results are amazing looking! :) Thanks for sharing!!
ReplyDeletepretty! I need to do some foiling again and yes, I know about failing too! lol So fun Patti!
ReplyDeleteWonderful tutorial, Patti! Awesome cards.
ReplyDeleteFabulous tutorial and beautiful cards Patti!
ReplyDeleteWOW! Some great foiling ideas on this one (did you know there is a Nuvo pen that you can use on your stamps & foil the image? It's watersoluble!) Loved seeing the pictures of each step, and have not yet tried going over embossing with the foil & laminator. Have done the glue pen - done the Minc Laser print...but you did some terrific looks with your techniques. Especially loved the sponged card - also great idea with the sticky tape. I think the sticky emboss powder works too, but so far only tried the sticky powder with gilding flakes (not a great look on my finished product). I enjoy seeing the boo-boos that crafters make too, as I learn a lot from that also. Didn't see any boo-boos on these pretty cards though! TFS & Hugs.
ReplyDeleteYour cards are beautiful. I've tried foiling a couple of times, but you're right, practice is a must or the foiling will turn into failing :-) What foil brand did you use for your projects?
ReplyDeleteHugs,
Lena
Your cards are gorgeous. I have not tried foiling as I don't have a laminator but I guess there are other ways of doing it. Maybe one day.
ReplyDeleteGorgeous!!! Great job with foiling, my friend and a fabulous POTW!
ReplyDeleteGreat tutorial - now I think I have to try this I do like the solid images more than the image outlines.
ReplyDeleteThanks so much for the tutorial. I'd really like to get a laminator and give this technique a try. I figure I could also use the laminator for other things...like laminating. he he
ReplyDeleteOh my heavens and stars. Your cards are TERRIFIC, especially the second one. Foiling does look a little complicated. You rocked it!
ReplyDeleteThese turned out amazing!!! I am IN LOVE!!!!!!!!!!!!!!
ReplyDeleteOh wow, those turned out fabulous. I loved the all over foiled flower card. Thanks for sharing.
ReplyDeleteUMMMM - HELLO!!!! These are gorgeous cards - so wonderfully done and I am so excited to learn another trick!! You did amazing, dear friend!! Love it!!!
ReplyDeleteWell I'm glad you stuck with it Patti, these are fabulous!
ReplyDeleteI never found any foil tape here
ReplyDeletemaybe if you send me one pcs I can try your tutorial number 2
its a cool idea to coloring your flower like that
the technique I love it Patti wanna try if I have that foil tape...(you know my address right SMILE)
both are beautiful card