
The hills were just cut, freestyle. No ryhme or reason. The first layer was adhered directly to the card front. The next two layers were each adhered with foam, for added dimension. Sadly, the bike is out of stock, but be sure to check out the store - there are lanterns, birdbaths & birds, etc. Lots of other options!
One more share for the day - ScrapTownLady now carries the Kreate-a-Lope! Talk about an easy, fun way to create your envelopes! You can adjust the envelope opening exactly where you want it, so you have a fun and creative place to display your recipients address, too! Check it out:
 |
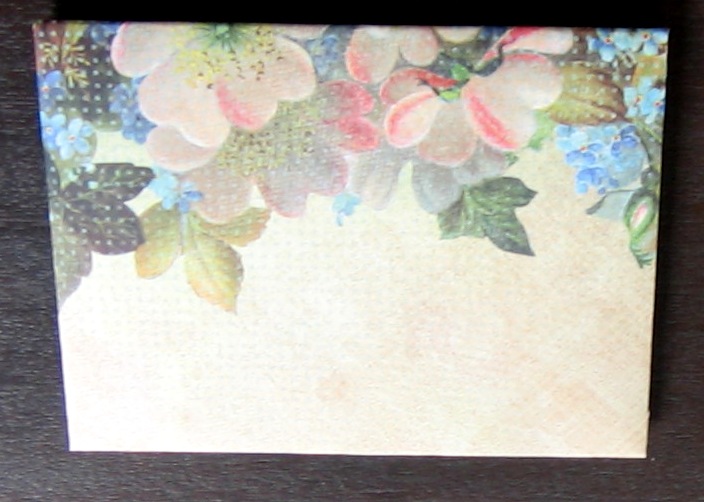
| Start by aligning your template where you choose. I wanted to end up with some lovely flowers on my envie front, so you can see that I placed the opening over the flowered area. |
 |
| Holding the template firmly in place, begin tearing. |
 |
| Continue tearing, all the way around each edge. |
 |
| Now you will place the template on the back side, matching your torn edges. |
 |
| Place the rectangle template in the center of your first template. |
 |
| Begin by folding in your side edges. |
 |
| Next fold up and adhere the bottom edge. |
 |
| Last, you will apply the Lick and Stick Envelope Glue (sold at ScrapTownLady), let dry, and moisten when ready to seal envelope. |
 |
| Voila! Wouldn't this be pretty with one of your handmade cards tucked inside? |
Hopefully, you are having a great week! Mine's been good, so far... I may change my mind after my morning dental appointment today!
Thanks for stopping by! I hope you will become a follower over at the ScrapTownLady blog - each day promises lots of inspiration, and we have guest designers every Sunday!
ScrapTownLady Supplies (Bike Card):
Impression Obsession Hydrangea Stamp Set (Flowers stamped onto tree)
Impression Obsession Hydrangea Dies (Flowers in basket of bike)
Impression Obsession Bare Tree Die
Impression Obsession Clouds Dies
Impression Obsession 'Summer' Stamp
Melissa Frances Shabby Chic Treasures "Bike"
KaiserCraft Lavender Pearls
Tattered Rose Distress Ink (Flowers)
Dusty Concord Distress Ink (Flowers)
KaiserCraft 'Powder Blue' Cardstock (card base)
Scrapbook Adhesives Foam Squares
KaiserCraft 75 cents 'Sovereign' Designer Paper
KaiserCraft Lavendar Haze 'Thistle' Designer Paper
KaiserCraft Lavendar Haze 'Mulberry' Designer Paper
Other Supplies:
Memento Tuxedo Black Ink (sentiment)
Dotted Swiss Embossing Folder (clouds)
Kreate-a-Lope
Lick & Stick
Hugs,
Patti J.
Thanks for another fab tutorial, now all I need is the template:O) Your card is wonderful Patti, loving all those layers and cut outs!
ReplyDeletehugs
Glenda
Loving your summer card....can't remember when I last rode a bike.....yes I can....tons of years ago.........lol Great demo on the envelope, Annette x
ReplyDeletehow cool!! TFS this gorgeous porject!!
ReplyDeletelove, love, love the card! it's gorgeous! nice... and i just got that envelope maker from OMYCRAFTS!!! duh!
ReplyDeletehave a great day!
hugs :)
OMG - LOVE IT - the bike is perfect going up the hills - great job on free cutting the hills. Love all the detail. Off on our adventure this am. Will talk to you when we get back.
ReplyDeleteLoving the white bike. Just a great card. I am digging the tutorials!!
ReplyDeleteWhat a pretty little scene! Great tutorial!!
ReplyDeleteI was smiling yesterday when I finally realized that you and Shirley are friends! So fun and such a small world!
WOW!! I really love this scene you've created Patti!! That summer definition is awesome! :)
ReplyDeleteDarling card - I especially love the swooping hills and the bike! I've got a bike like that and just need the wicker basket to make it perfect. I'll just show this card to the hubs so he can see that yes, people DO still use and like those baskets lol. I've got one of those envie templates from years and years ago - isn't it a blast that just tearing and folding creates such cool envelopes? Great step-by-step tut!
ReplyDeleteOh what acute card....And it's SO happy!!!!
ReplyDeleteOh what acute card....And it's SO happy!!!!
ReplyDeleteOMgosh do I ever love this card. That bicycle is awesome.
ReplyDeleteFabulous card... that bike is so detailed! I love how you embossed the clouds. I need to buy that envelope maker!
ReplyDeleteSuch a pretty summery card, and I'm lovin your gorgeous envelope too!
ReplyDeleteThis is such a fun card! Great tutorial too!!!
ReplyDeleteWow! I really love this! Such a pretty and creative card.
ReplyDeleteSpectacular card, Patti! I just LOVE this beautiful composition. Everything about this is perfection -- your hills, wonderful placement of the sentiment and all the gorgeous die cuts, colors and layers.
ReplyDeleteAwesome job Patti! I haven't commented in a while, but I have been reading your posts! I love how you used the definition of summer has kinda the sentiment. Great envelope too!
ReplyDeleteWhat a beautiful card, and I admire the way you freehanded your hills. Great job. That is a lovely bike too. Liked your tutorial on the envelopes also. Always nice to have an envelope to fit a specific size too. TFS
ReplyDeleteWhat a fascinating way to make an envelope and I do love your handcut hills!!
ReplyDeleteand Thank you so much for the kind words on my Foam roses tutorial
Gorgeous card, great hills and clouds! Nice tutorial too. Thanks for sharing!
ReplyDeleteSweet card Patti. Love the bike and the tree and those sweet little blooms. The hills look awesome! Beautiful envelope!
ReplyDeleteAmazing dimension you created and that bike is amazing! Fantastic card and envelope!! tfs
ReplyDelete