Okay, let's get started!
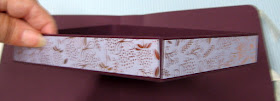
This photo shows the closed box, all tied up and ready for 'gifting'.
I have begun this tutorial using white cardstock, so that you can better see the steps.
Your 'box' will be 10 3/8" x 8 1/2".
This will be scored at 1" and 2" on all four sides.
Next, you will cut into the inner most score line on opposite sides, as shown below.
The next step is to remove the four end pieces, as shown below.
You will now be left with this. As you can see, I trimmed my 'tabs' in a bit, for a cleaner result, but this step is optional..
Once this is done, burnish all of your scored lines with your scoring tool, for crisp folds.
Flip this piece over, and add
Scor-Tape to the four 'tabs' as shown below.
I chose to use 1/2" tape, but use what you have on hand!
Hopefully, you can see how this will come together. Remove the liner from your
Scor-Tape, and begin folding the short sides up, adhering the 'tabs' on the short sides to the long sides.
Here you can see one side is in place, and the other is about to be adhered in place.
Your box, now looks like this.

Place
Scor-Tape to the inside of all four edges.
Remove the tape liner, and fold your flaps in. It helps make your box stronger if you burnish them in place with your bone folder.
Here is your finished box.
And...here it is in the burgandy color that I worked with for the project!
Now, lets make the box cover.
Your piece of cardstock will be cut to 11" x 7".
Score on long side at 5" and 6".
Round corners with a corner rounder punch if desired.
Here's what this looks like looking down on it.
Now, add some
Scoe-Tape as shown below. This will hold your ribbon in place.
Note that I don't bring the tape all the way to the inside or outside edge - this is where
your designer paper will be going, and we want a border showing around the DP.
Find the center of your ribbon (I began with about 26"), and put the center down first, working from the middle out to each side.
Now you need a piece of tape covering your spine area, as shown.
Adhere your Designer Paper panels, and spine to cover.
Here is what you have now.
For my cover, I used a piece of coordinating cardstock and cut out a sentiment.
All of this cardstock came to the Scor-Pal team from
DCWV - isn't it lovely?
Adhere border strips to front and side edges of your box.


Here is your finished project!
We hope you will give this a try!
Don't forget to enter our monthly challenge at
Scor-Pal!
You still have time to submit your bag or box - who knows? You could
be our next winner!
Thanks for stopping by,
Patti J.
Measurements:
Box Cover: 11" x 7" - score on long side at 5" and 6"
Box" 10 3/8" x 8 1/2" - score at 1" and 2" on all four sides
Front and back DP panels: 4 7/8" x 6 7/8" (cut 2)
Spine DP panel: 7'8" x 6 7/8" (cut 1)
Box Border Strips: 7/8" x 4 1/2" (cut 2)
7/8" x 6 1/2" (cut 1)
Ribbon: approx. 26" length


