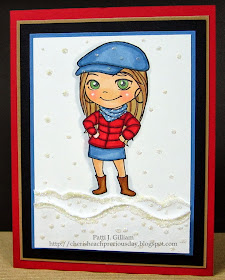
I love this Glamour Girls Stamp Set, and decided to create with it today. Since it is the Halloween season, purple, black, and green, seemed the perfect color choices!
Here is my finished card:
On to the tutorial...
 |
| Step 1. Create your card base. I chose to use an A2 base, so my card base is 5.5" x 4.25". |
 |
| Step 2. Finish card as desired. |
 |
| Step 3. Create inside piece for pop-up. It needs to be a bit smaller in length and width than your card base. |
 |
| Step 3. Here you can see the insert size - I just laid it on the card for the visual effect. Don't glue! You're not finished yet! |
 |
| Step 5. Cut in to your first drawn line. You'll have a little flappy looking piece like mine above. |
 |
| Step 6. Open your insert base. Use your fingers and gently push inwards on the flap you created. When you get it like you want it, gently fold your card, and press the flap flat. It should look like this! |
 |
| Step 7. Use adhesive of choice. Apply to your flap. |
 |
| Step 8. Apply your inside sentiment, image, die cut, etc. Voila! |
Thanks for hanging in with me - this was a long post! Hope you enjoyed it. Let me know if there are other things you'd like to see tutorials on - I'm willing to give it a try!
Be sure to check out the Scraptownlady Store for all of your card and scrapbooking supplies! Also, we hope you will follow the Scraptownlady Blog! There is always something new and beautiful to see - the DT is amazing!
Thanks again for stopping by,
Patti J.
Scraptownlady Supplies:
Other Supplies:
Black Ink
Perfect Layers Rulers (see my sidebar for details)
Perfect Paper Crafting Centering Ruler (see my sidebar for details)


